

In a world of debit cards and auto-drafts, writing a check might feel super outdated. But guess what? Some businesses are old school cool and require a check if you want to buy something. (They might even charge a fee if you pay with anything other than cash or check.) But if you were born after Y2K and grew up with a cell phone strapped to your hand, it’s totally possible you never learned how to fill out a check in the first place.
Hey, no shame there. The conveniences of modern technology make it easy to get away with not using checks. But if you need to write a check to pay rent or want to learn this life skill out of curiosity, I’m going to teach you how. Here are the six simple steps for how to write a check:
How to Write a Check in Six Steps
Step 1: Date the check.
Step 2: Fill out who the check is for.
Step 3: Write the dollar amount in numbers.
Step 4: Write the dollar amount in words.
Step 5: Fill in the memo.
Step 6: Sign the check.
Step 1: Date the check.
Fill in the day, month and year that you’re writing the check in the date box.
Step 2: Fill out who the check is for.
Write the first and last name of the person (or the full name of the business) you’re paying on the line next to Pay to the Order of. If you don’t know the name, you can write “Cash”—but be careful, because this means anyone could deposit the check into their account.
Step 3: Write the dollar amount in numbers.
In the box on the right side of the check, write the payment you’re making in numbers, like $1,200.50.
(If you accidentally write the wrong number, you can draw a line through it, correct it, and then initial by the correction.)
Step 4: Write the dollar amount in words.
On the amount line, you’ll write the dollar amount you’re paying in words, and the cents in numbers after the words. So, you’ll write “One thousand two hundred dollars and 50/100” because you’re paying fifty cents. You’ll love how old timey it feels to write out a number using words.
Sidenote: If you were paying $1,200.00, you’d write 00/100. You can also write “one thousand two hundred dollars even.” If you only write “one thousand two hundred,” be sure to draw a line through the rest of the space so no one can write in extra dollars or cents.
I know this seems repetitive, but it adds extra security when you’re 100% clear how much money you’re talking about.
Step 5: Fill in the memo.
Sometimes this line says For instead of Memo. It’s where you write what you’re using the check to pay for, like “rent,” “September water bill” or “iPhone repair.” Sometimes this section is optional, but it’s best to add a note for clarity’s sake. And if you’re paying a bill, it’s a good idea to add your account number or invoice number to this section, that way the money goes to the correct account.
Step 6: Sign the check.
Now it’s time to sign, seal and deliver. Go ahead and autograph the check in the bottom right-hand corner. This makes it officially payable to the payee (aka they can cash it).
Make sure the name you sign matches your account holder name at the top left of the check. If people call you by your middle name or nickname, but your legal first name is printed on the check, sign with your first name.
After You Fill Out a Check
After you fill out the check, you’ll need to write down the details in your checkbook register. The register is a scrawny little notebook with a bunch of columns and rows. It comes with the checkbook and helps you organize and record your spending and income.
Budget every dollar, every month. Get started with EveryDollar!
If you like to do a written budget, you can use that checkbook register to write down all your expenses and income—not just checks. When you use your debit card or go to the ATM (to deposit or withdraw money), you’ll have to write down that transaction too.
More Money. Less Stress. Yes, Please.
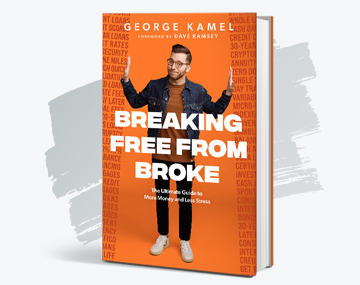
In his new book, George Kamel does the research for you and exposes all the worst money traps out there so you can build real wealth!
How to Balance a Checkbook
Here’s how to fill out your checkbook register when you use a check, make a purchase, or bring in income:
- Number or Code: Write the check number here. If the transaction wasn’t a check, make yourself a code like DC for debit card, T for transferring money from one account to another, D for deposit, or ATM. Because let’s be honest: You won’t remember those details when you look back to balance your checkbook later. Help your future self out!
- Date: Put in the day, month and year of the purchase or transaction.
- Transaction Description: Write the name of the person or business and a quick note like “haircut” or “electrician” to help you remember what that money was used for or why it was transferred.
- Payment Amount: If you’re making a purchase or paying a bill, write how much money is going out here.
- Deposit Amount: If the transaction is money coming in, write how much here.
- Balance: All right, time to do some math. Subtract the expense or add the deposit so you know your current balance—and if you get close to a $0 balance, look out, because you’re close to getting an overdraft fee.
Security Tips for Writing a Check
Any time you’re dealing with money and your identity, it’s important to be super secure. I don’t want someone pretending to be you and draining your bank account to pay for a trip to Hawaii. I want you to enjoy a trip to Hawaii with your own money. (Those fruity umbrella drinks won’t pay for themselves—unless you’re an identity thief.) Here are a few security tips for writing a check:
Use a pen.
If you write a check in pencil, someone can erase it and change the amount or replace the name in the Pay to the Order of line. Nope, not cool. Don’t let the crook get their way! Always use dark ink.
Fill the entire amount box and amount line.
When you’re writing a check, don’t leave blank space in the amount box or amount line. Someone could change a period into a comma and make you pay a lot more than you signed up for. Write the numbers big enough to fill the box and the words big enough to fill the whole line—or add a line after the written dollar amount to fill up extra space, like in the sample check example.
Don’t sign the check until it’s filled out.
Never carry a signed blank check in your checkbook or wallet. It could fall out, then poof! There go all your dollars into a stranger’s bank account. You should sign the check only after you’ve addressed the check to a person or business and filled out the amount. This way, no one can forge the check amount with your signature.
Don’t practice your signature on the check.
Do that before you sit down to write a check, not while you’re writing it. You don’t want banks questioning fraud because your signature doesn’t look the same.
How to Endorse a Check
While we’re talking about writing a check, I want to cover one more topic: endorsing a check. What does endorsing a check mean? It’s when you sign a check that’s been written to you so you can cash it or deposit it. Cha-ching! This is important if your sweet little grandma sends you a check for your birthday or Christmas, so pay attention.
How you endorse a check depends on what you want to do with it. If you want to cash the check so you can have cash in hand, sign it in the box on the back that says Endorse Here.
If you want to deposit the money into your bank account—whether it’s via an ATM, a bank teller or a mobile deposit—write “For deposit to account” plus your bank account number, then sign. And remember, all those words need to fit inside the signing area.
One callout here: If you’re doing a mobile deposit, your bank might have some specific guidelines. So, check out those before you sign.
Keeping Up With Income and Expenses
Okay, so that was a lot. And let’s be honest—if you’re using your checkbook register to log in all income and expenses, can I suggest a better and easier way?
A budgeting app—specifically, the EveryDollar budgeting app.
It also really helps if your budgeting app connects to your bank so transactions can stream right to your budget. Then, instead of filling out five rows every time you spend or make money, you can just drag and drop the transaction to the right budget line. That’s exactly what you’ll get with the premium version of EveryDollar.
And I nearly forgot the best part: less math! No more adding and subtracting to check your account balance. It’s automatic, and you can see it right inside the app. Start budgeting with EveryDollar today!
Frequently Asked Questions
-
How do I order more checks?
-
If you use checks often, you’ll eventually run out and need to order more. Some banks offer free checks when you open a new account—otherwise you’ll have to order checks online through your bank. Keep an existing check with you when you make your order so you can reference this important information:
-
- Account number
- Routing number
- Bank information
- Contact information
-
-
Can I write a check to myself?
-
Writing a check is another way to make a cash withdrawal from your account. It’s not the most efficient, but it works. You’ll just write your name on the payee line.
-
How do I void a check?
-
Voiding a check makes it unpayable to anyone. Sometimes an employer requests a voided check to set up your direct deposit, or you can void a check to help set up automatic bill pay. Voiding a check is also how you cancel a check if you make a mistake filling it out. Just write “VOID” in giant letters across the front of the check so it can’t be filled out or altered.
-
What are the numbers on the bottom of a check?
-
When you look at the bottom of your check, you’ll see three groups of numbers. The left group of numbers is your bank routing number—this identifies your bank. The second group is your account number, which labels your bank savings or checking account. The final group is the check number, and this organizes your payments.
-
How do I make a mobile deposit?
-
This is where old school checks meet modern technology. Plenty of banks have an option on their mobile app allowing you to deposit checks via your smartphone. Just open the banking app, find a button that says Deposit, and you’ll be prompted to take photos of the front and back of the check to scan it into the app.
You’ll also manually type in the check amount so the money gets deposited correctly. Boom, done. No more driving to the bank to use that funny cannister that gets sucked up into the ceiling tube like a vacuum hose eating your dirty socks. (This is exactly why dirty socks go in the hamper instead of tossing them on the floor!)
-
Can I deposit a check at an ATM?
-
Some banks allow you to deposit checks at an ATM. Check with your bank or credit union to see if they allow ATM deposits and where to find eligible ATM locations.
-
How do I write a check to the IRS?
-
When you write a check to the IRS (to pay taxes, for example), you need to include your name, address, phone number, Social Security number, tax year and the related tax form or notice number. You can also contact the IRS or your tax pro for more details.
-
Is it illegal to write a postdated check?
-
Postdated checks are written with a future date on them. People cross their fingers and hope their check will be deposited later—once they have more money in their bank account. But this is risky business! Postdated checks aren’t illegal, but they can be deposited any time. Meaning, as soon as you hand that check over to the utility company or your yard guy, it could be deposited . . . and bounce. That’ll cost you an ugly overdraft fee. So, if you don’t have any money in your account, it’s not a good idea to write a check.
Did you find this article helpful? Share it!

About the author
George Kamel